ARS Online Manual
ARS Incident Reports
An ARS Incident Report can be produced by users in order to monitor the work-related accident experience for an entire agency or specific locations within one. The report provides the following data fields for incidents that occurred within a specified period of time:
- social security number of the injured employee;
- name of the injured employee;
- county in which the employee works in;
- incident number;
- medical treatment received (Yes or No);
- lost time from work (Yes or No);
- date and time of the incident;
- date incident was reported to ARS;
- date the C2 form was sent;
- title of the employee; and
- negotiating unit.
The data can be sorted by any of the data fields except the date the C2 form was sent.
Follow the instructions below to create and print an ARS Incident Report.
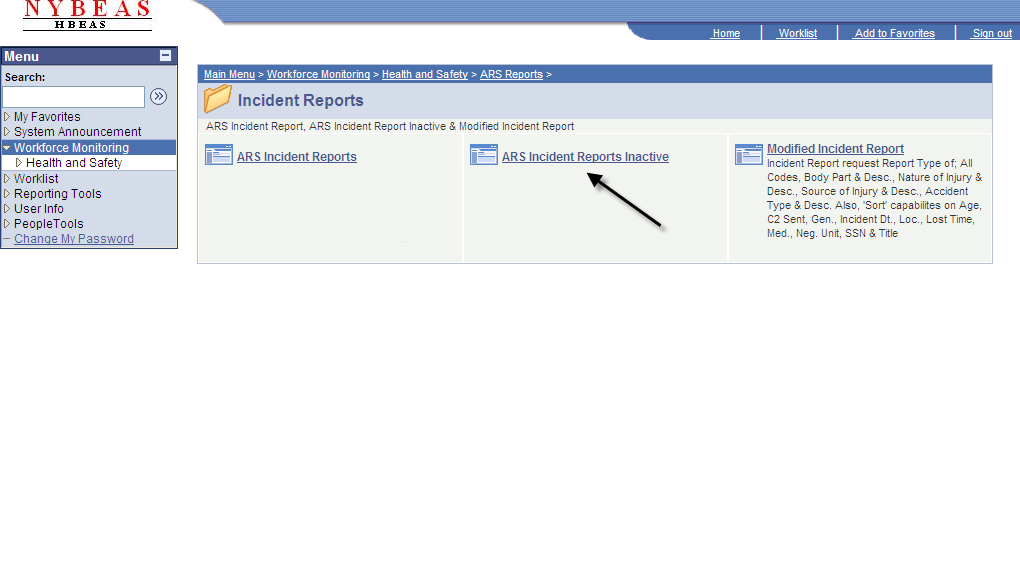
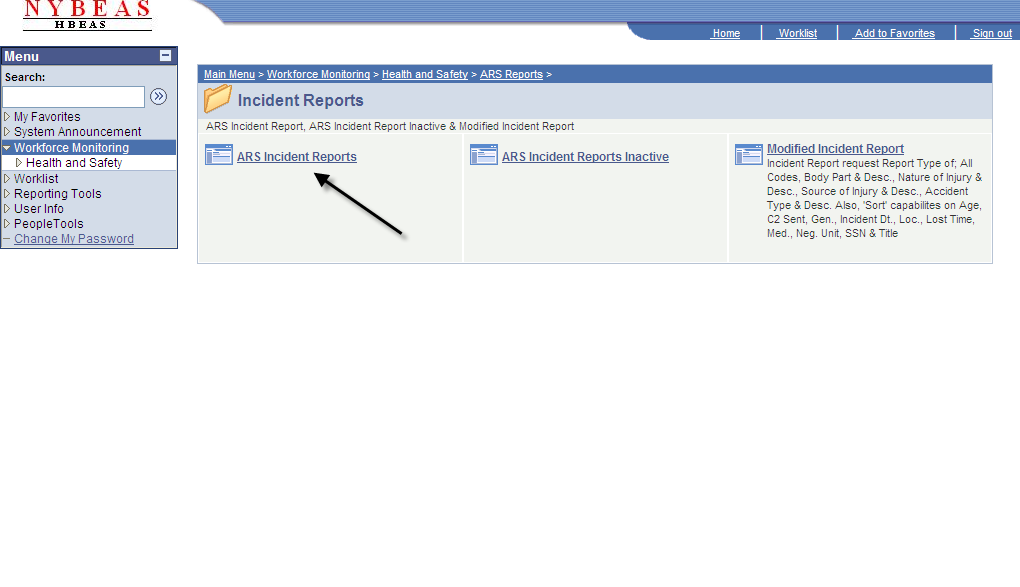
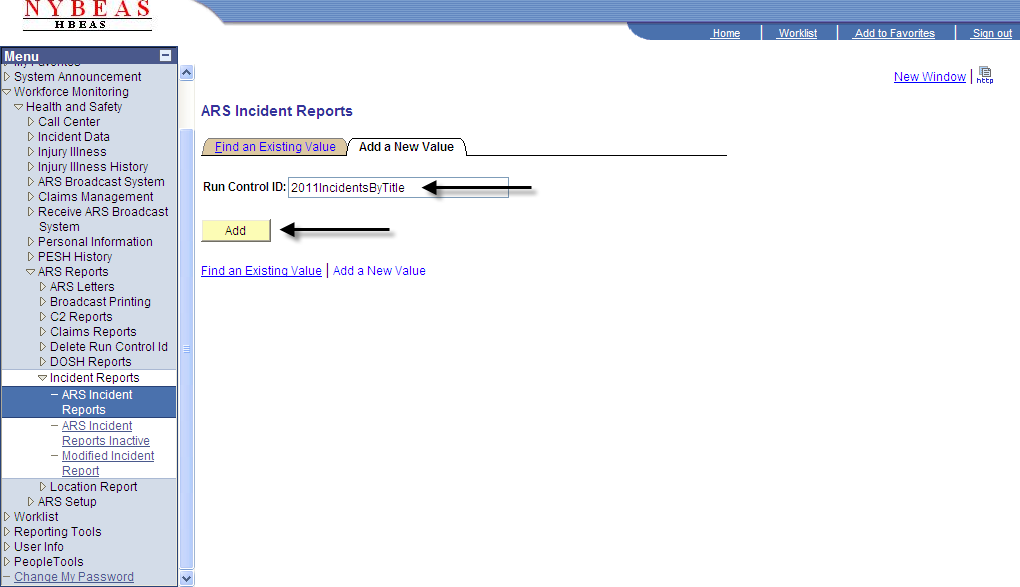
Within the Incident Reports folder, click on ARS Incident Reports.
If you would like to run a report again and a Run Control ID has already been created, click Search.

Select the appropriate Run Control ID.
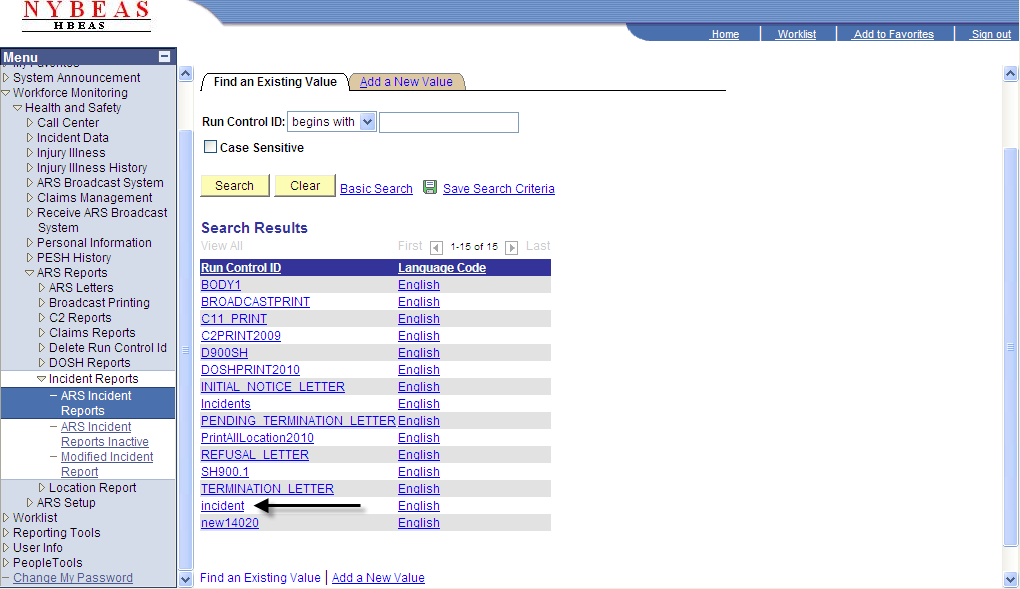
If you are creating an ARS Incident Report for the first time, click on Add a New Value.
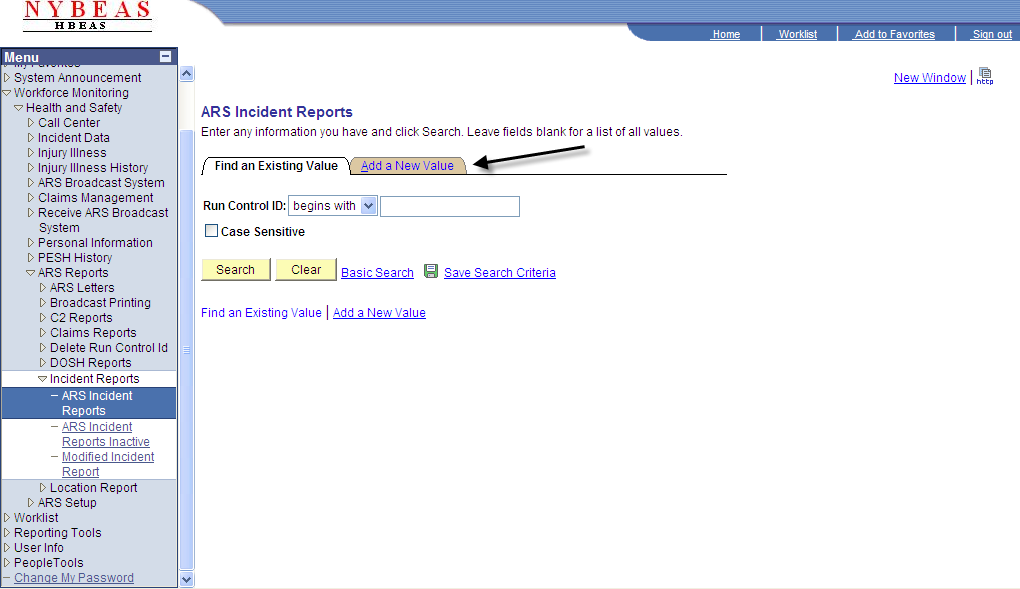
Enter a Run Control ID and click Add. The Run Control ID can be entered as any word or phrase excluding spaces.
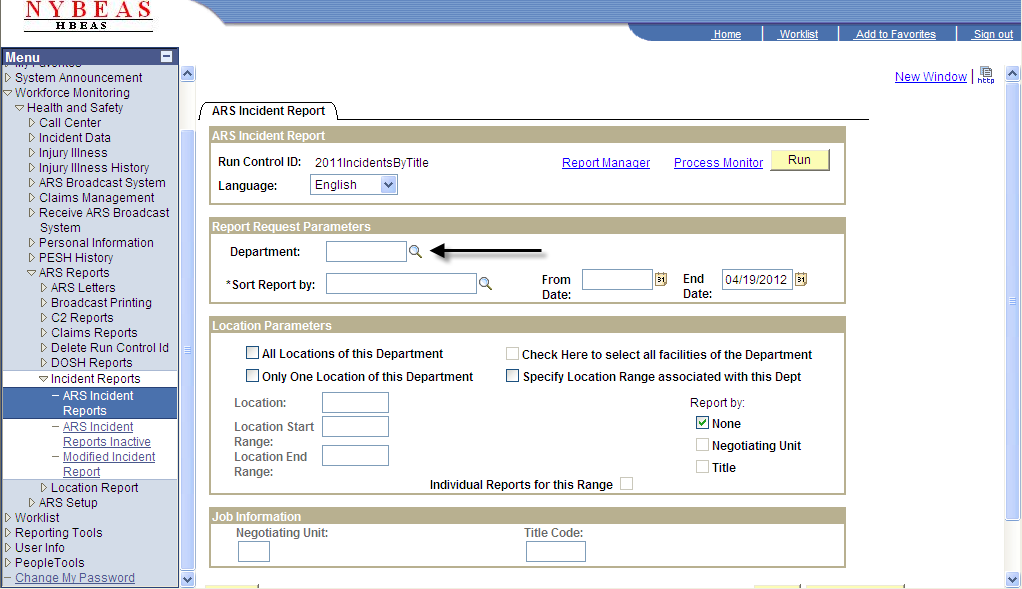
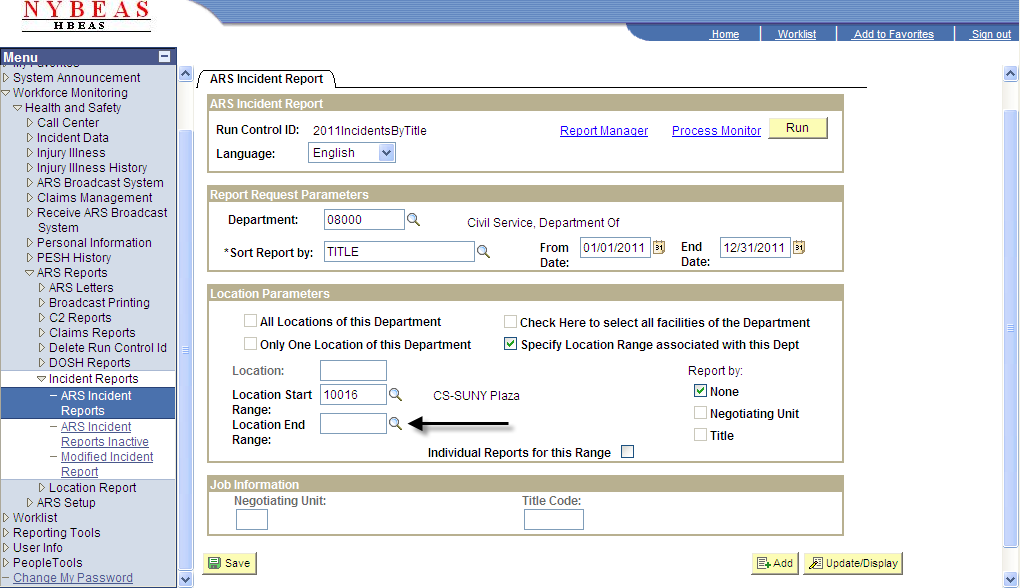
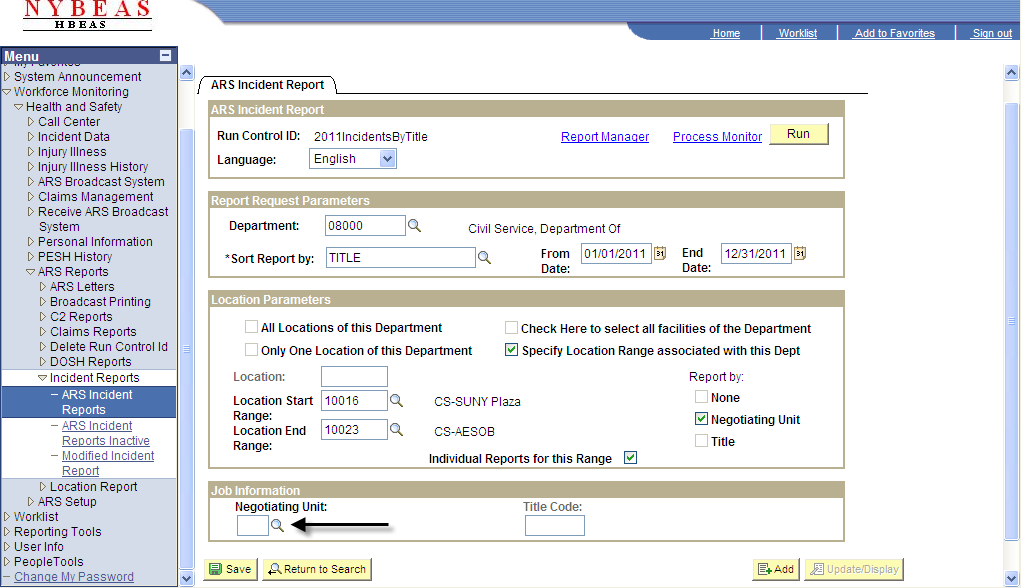
Enter the five digit department ID number (Dept ID) of your agency.

If you are unsure of the Dept ID number, click on the magnifying glass icon next to Department.
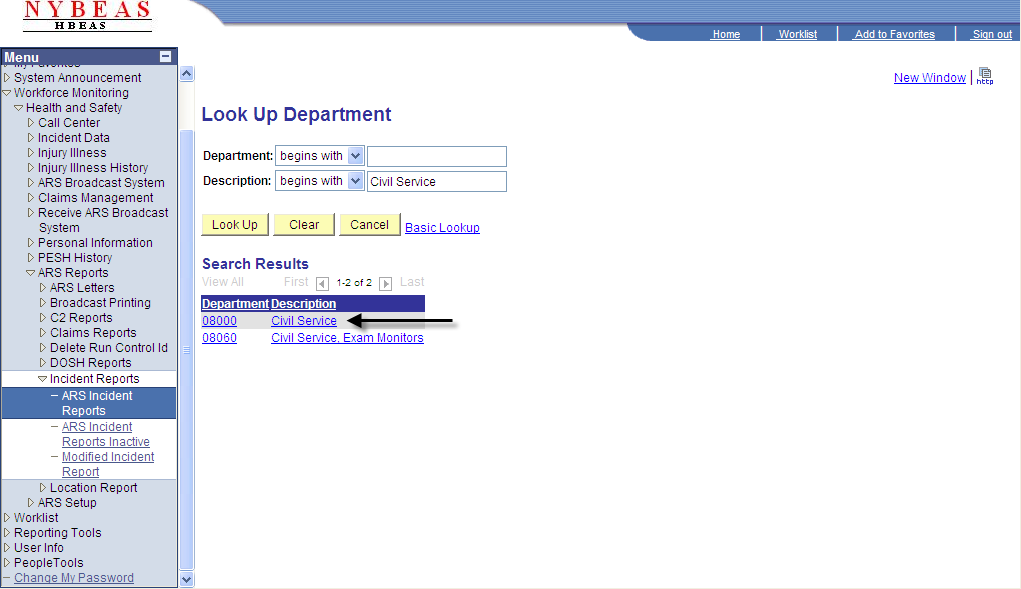
Enter an accurate description for the name of your agency and click Look Up.
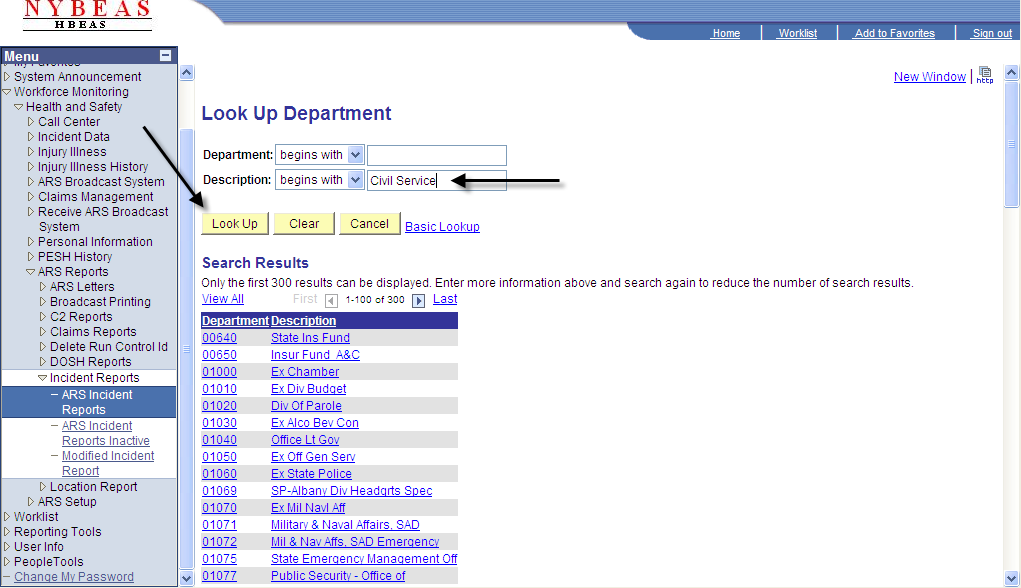
Click on the appropriate department.
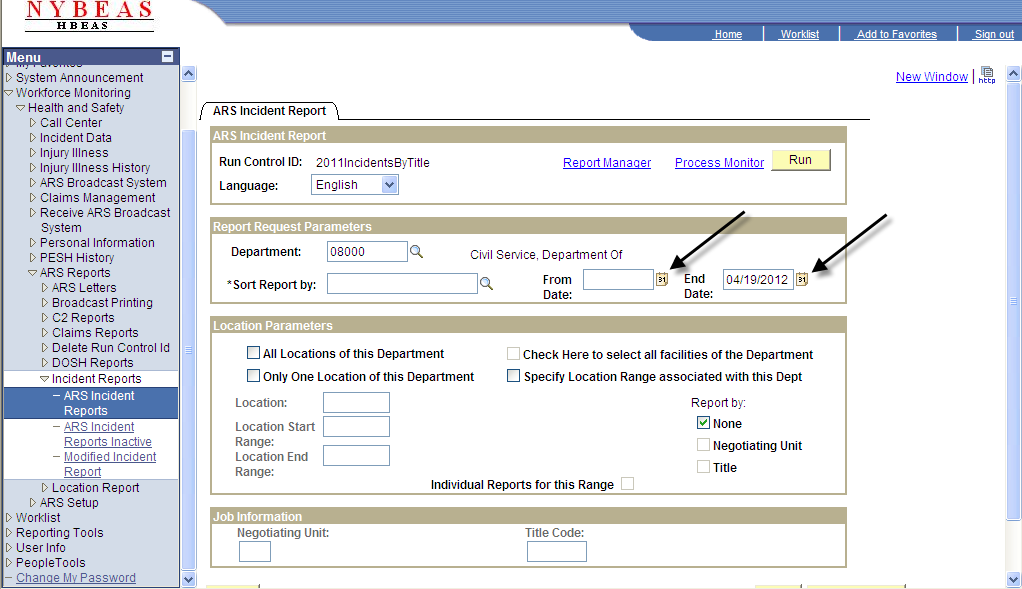
Enter the date parameters (From Date and End Date) of the incidents you would like to capture in the report by using the calendar features.
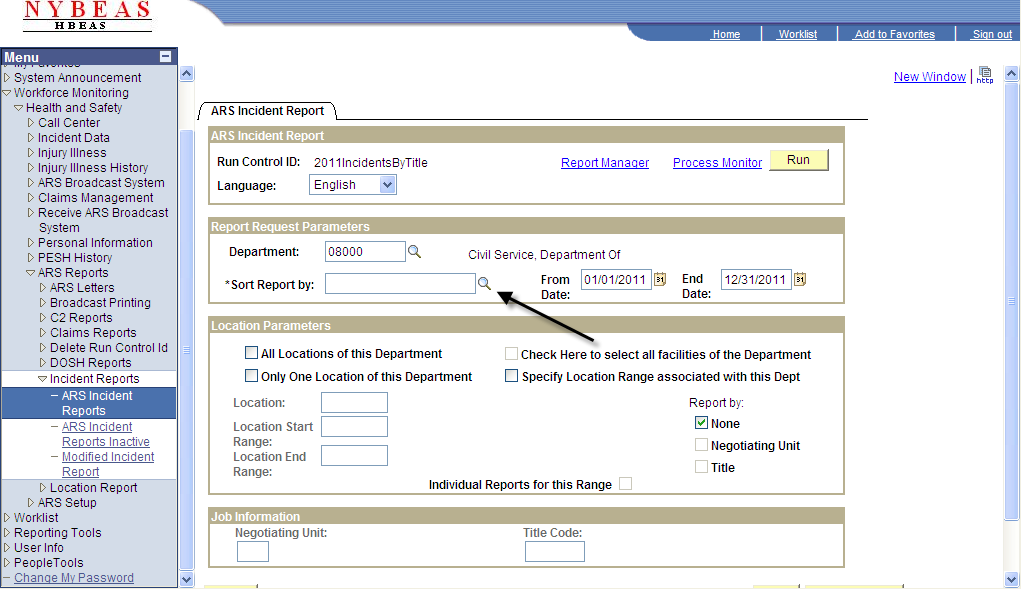
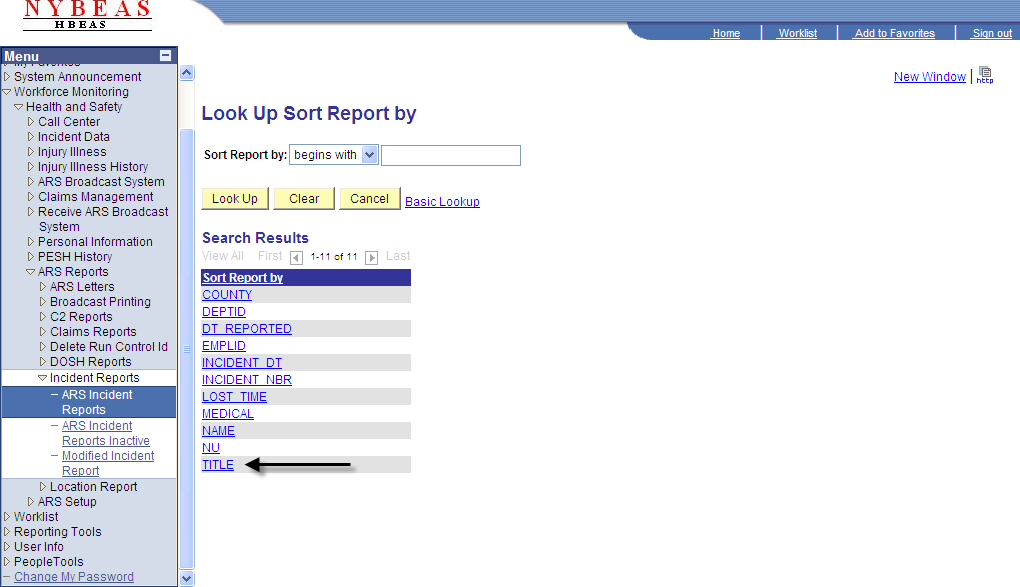
Use the magnifying glass next to Sort Report by to determine how you would like the report to be sorted.
Select how the report will be sorted.
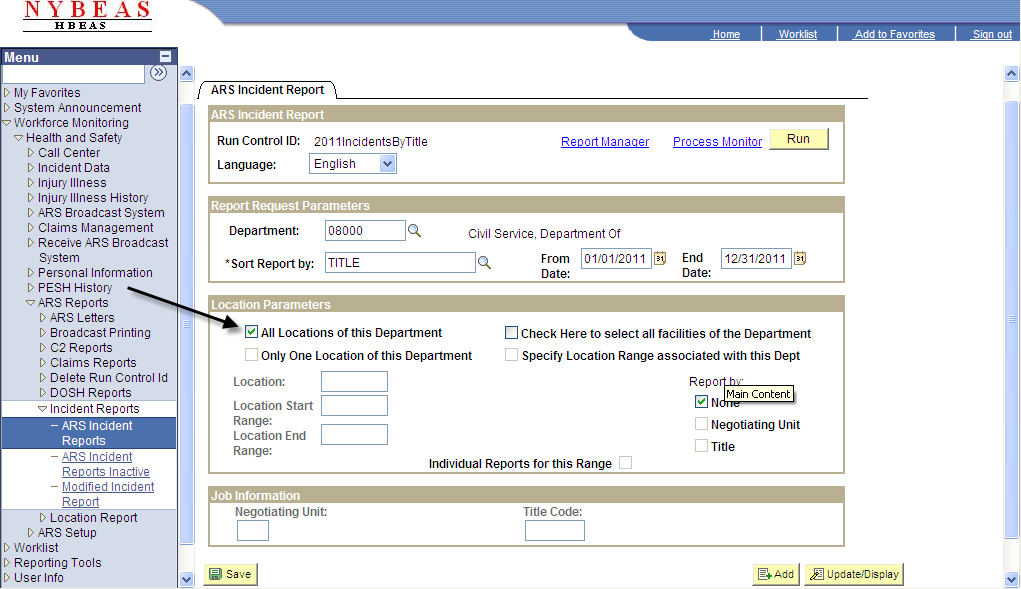
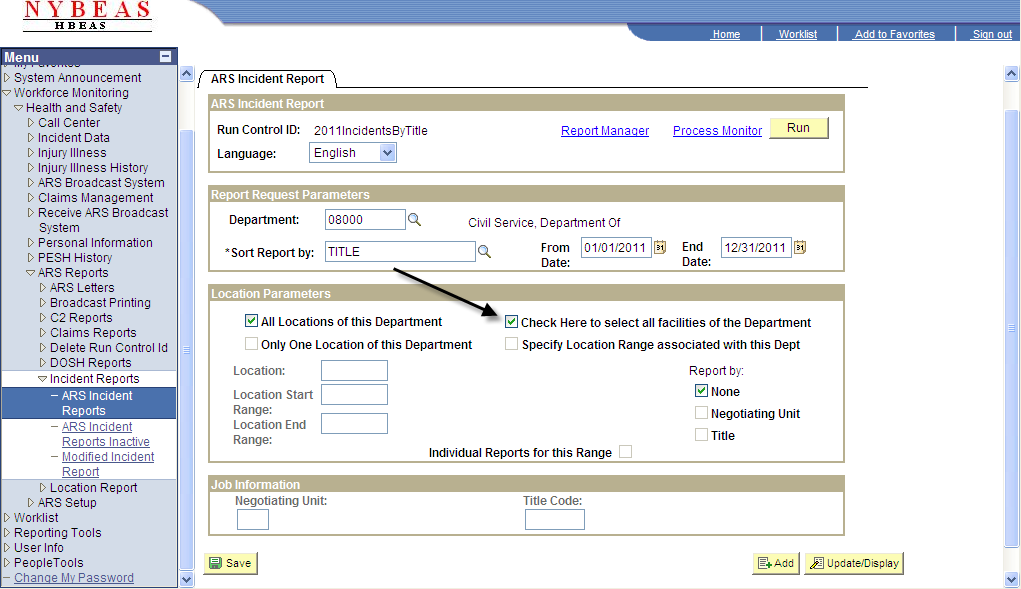
Check All Locations of this Department to create a report showing all incidents by employees from all locations associated with the Dept ID number entered above.
Check the box next to Check Here to select all facilities of the Department to include all facilities associated with the Dept ID number entered above. For example, if your agency has multiple Dept ID's (one for a Main Office and additional for other locations within an agency), all incidents for each Dept ID number can be captured.
In order to create a report for only one location associated with a department ID, check Only One Location of this Department. Click the magnifying glass icon to select the appropriate location.
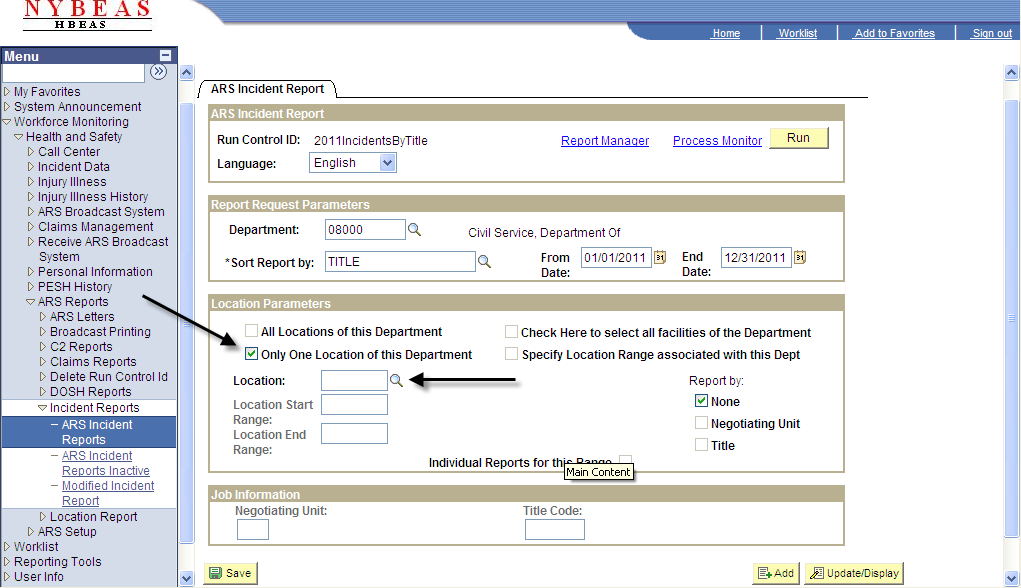
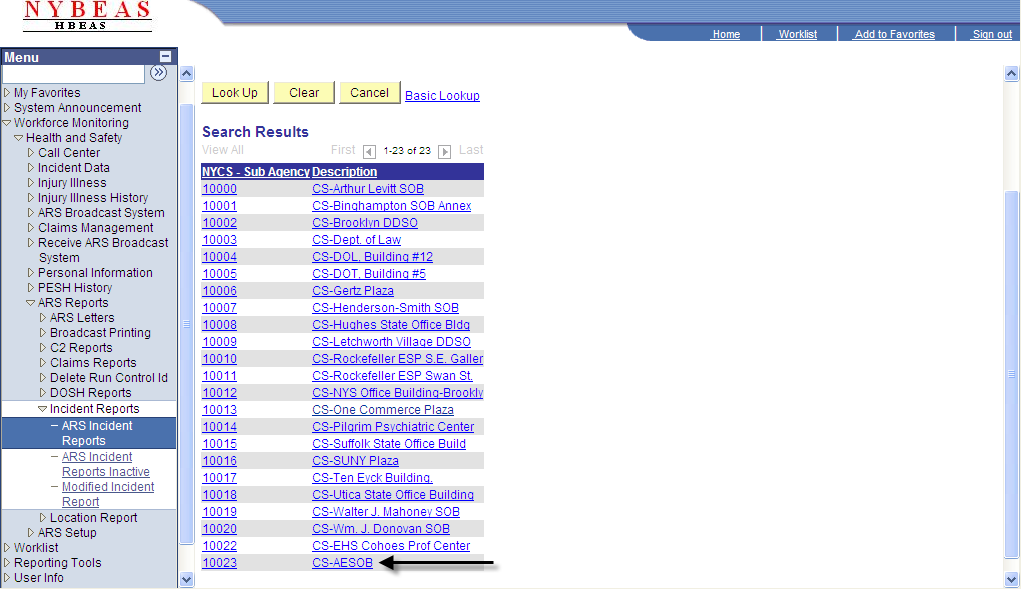
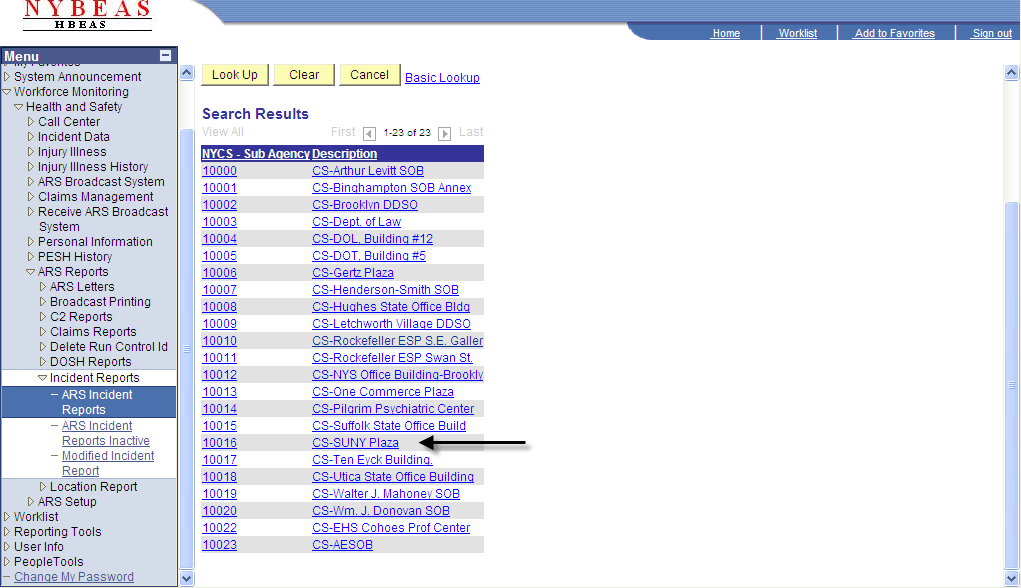
Click on the location in which the report will be created for.
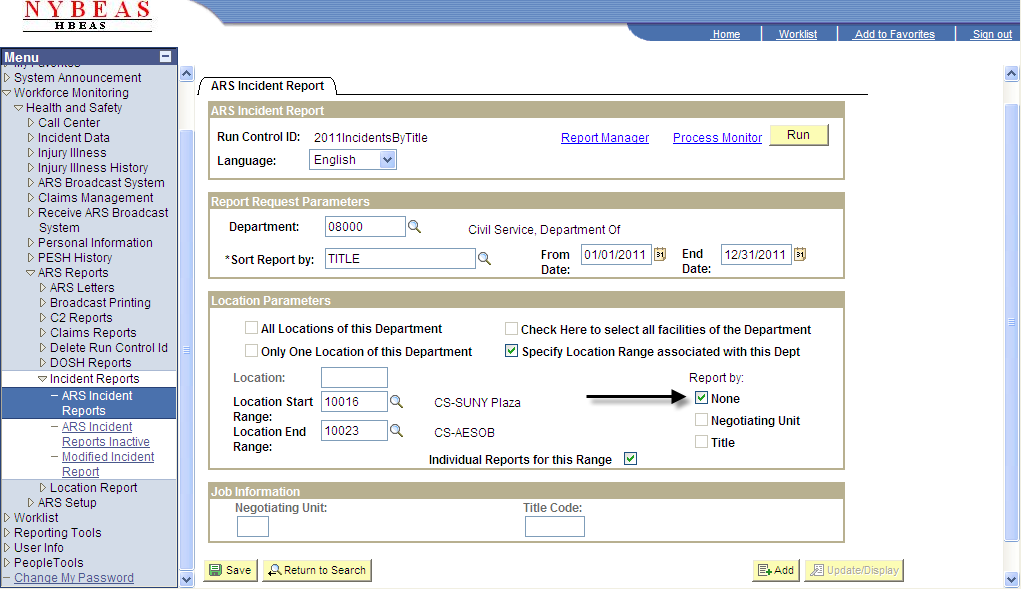
Check Specify Location Range associated with the Dept to create a report multiple locations associated with an Dept ID.

Click the magnifying glass icon next to Location Start Range to select a location from which the range will begin.

Click on the description of the location which will be the first of the range.
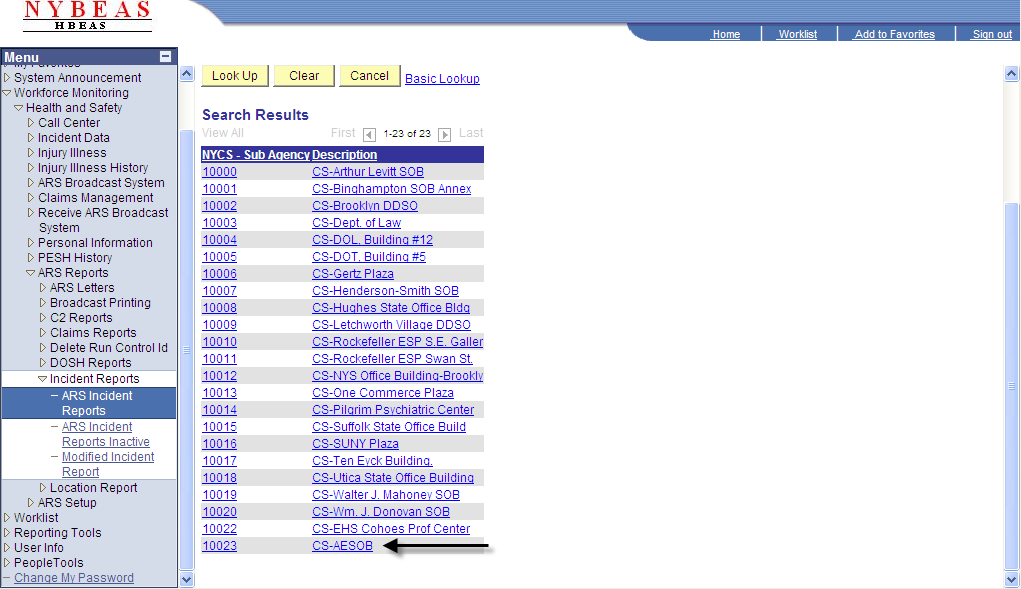
Click the magnifying glass icon next to Location End Range to select a location from which the range will end.
Click on the description of the location which will be the last of the range.
In order to print the results for each location on individual pages of the report, check the box next to Individual Reports for this Range.

In order to run the report for only one Negotiating Unit or Title, unclick the box next to None.
In order to create a report displaying incidents for employees within one negotiating unit, check the box next to Negotiating Unit.
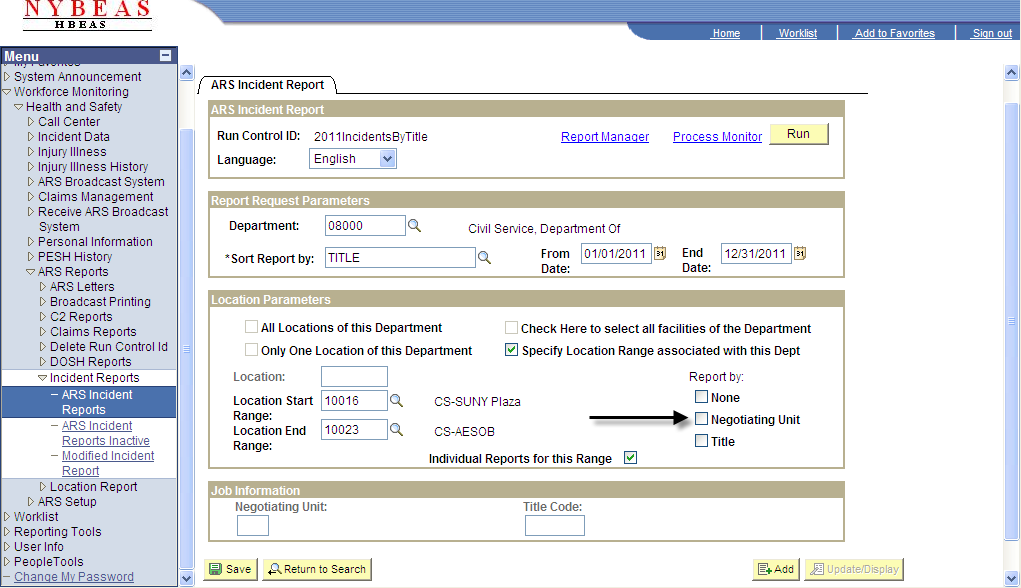
Click on the magnifying glass icon beneath Negotiating Unit.
Select the appropriate code of the Negotiating Unit.
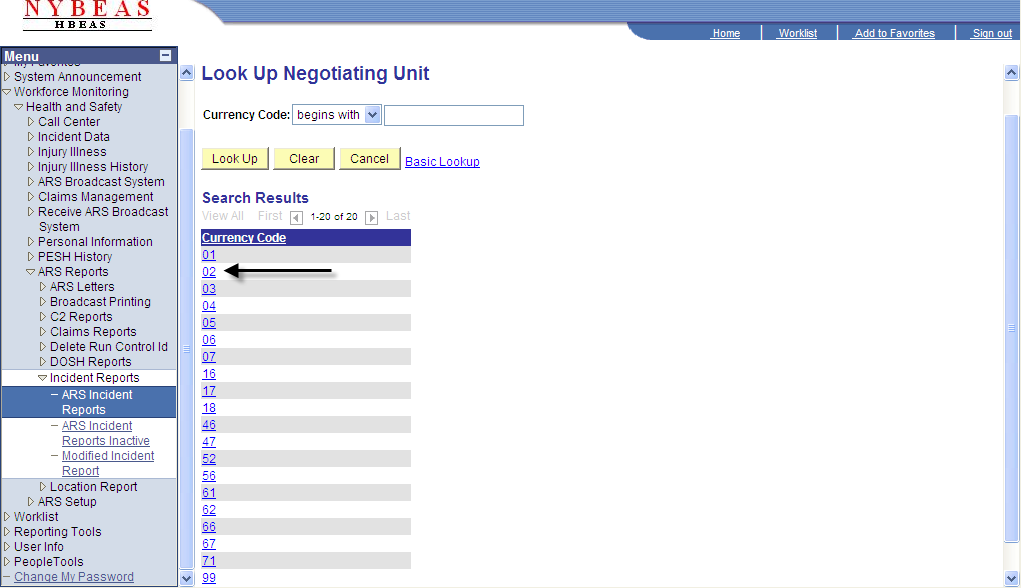
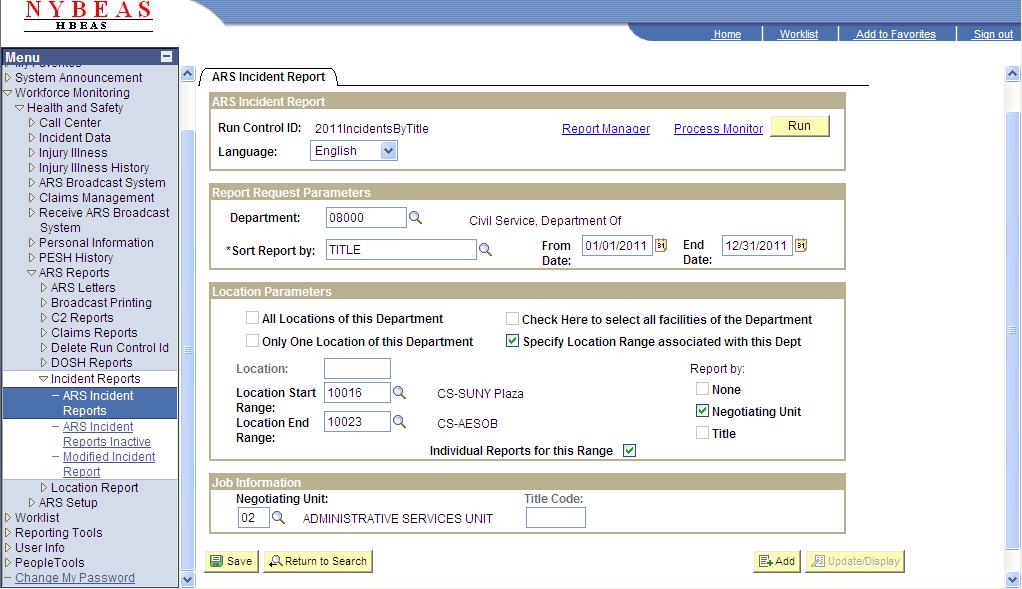
The description of the Negotiating Unit will automatically populate within the Job Information box.
In order to create a report displaying incidents for employees with one specific title, check the box next to Title.
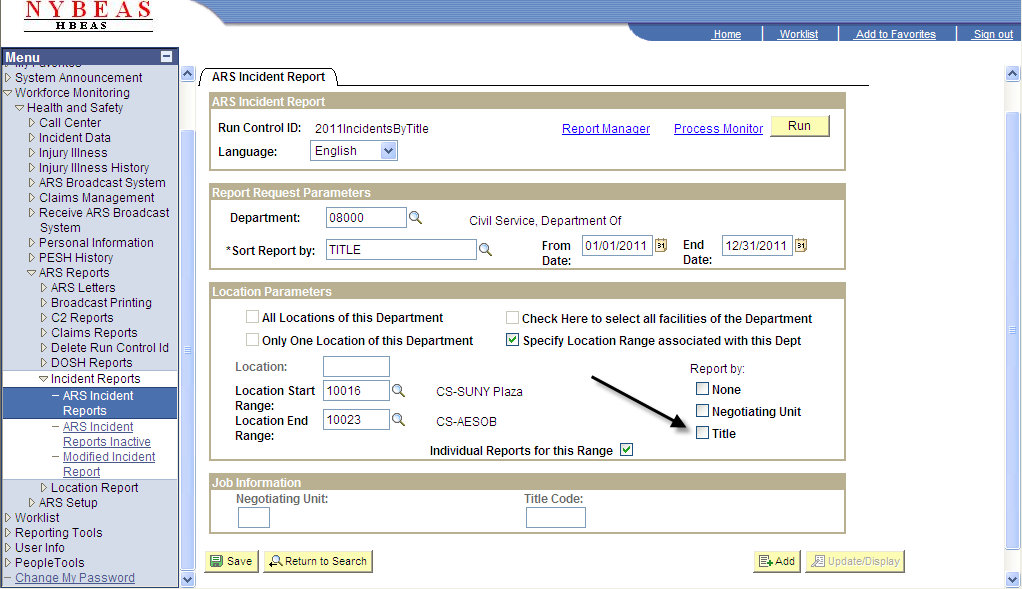
Click on the magnifying glass icon beneath Title Code.
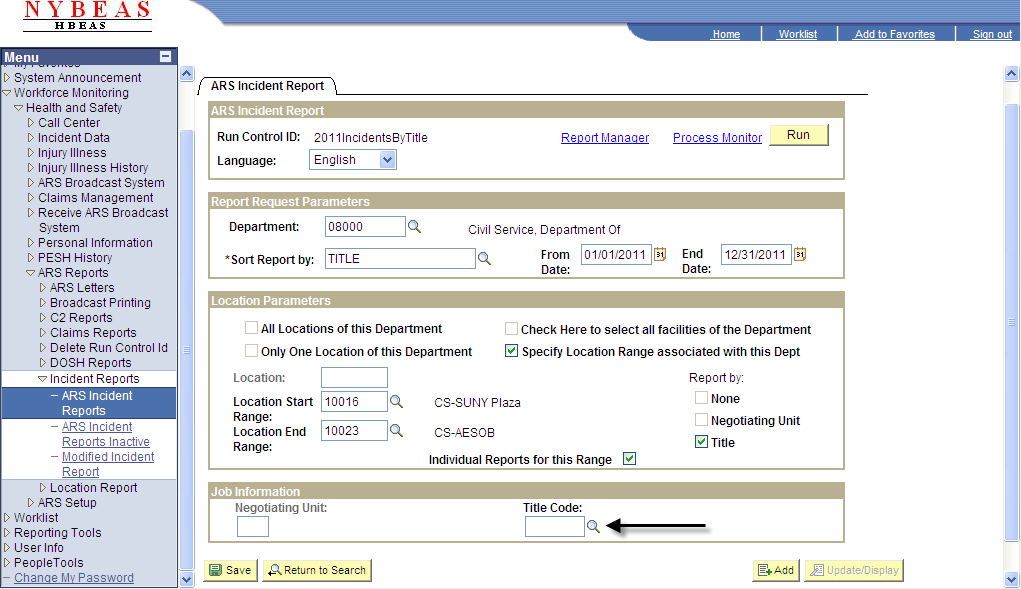
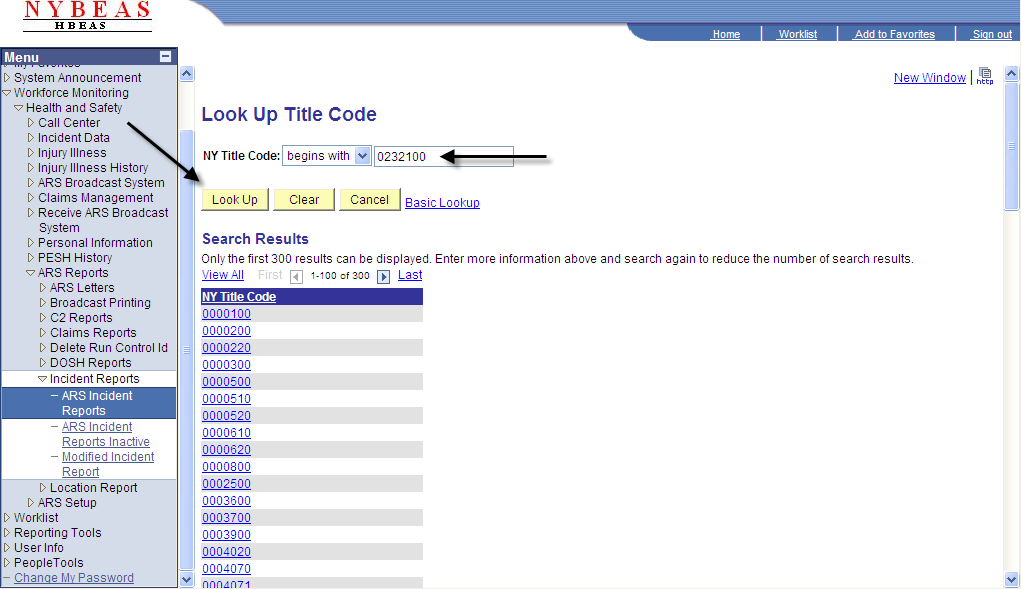
Enter the Title Code and click Look Up.
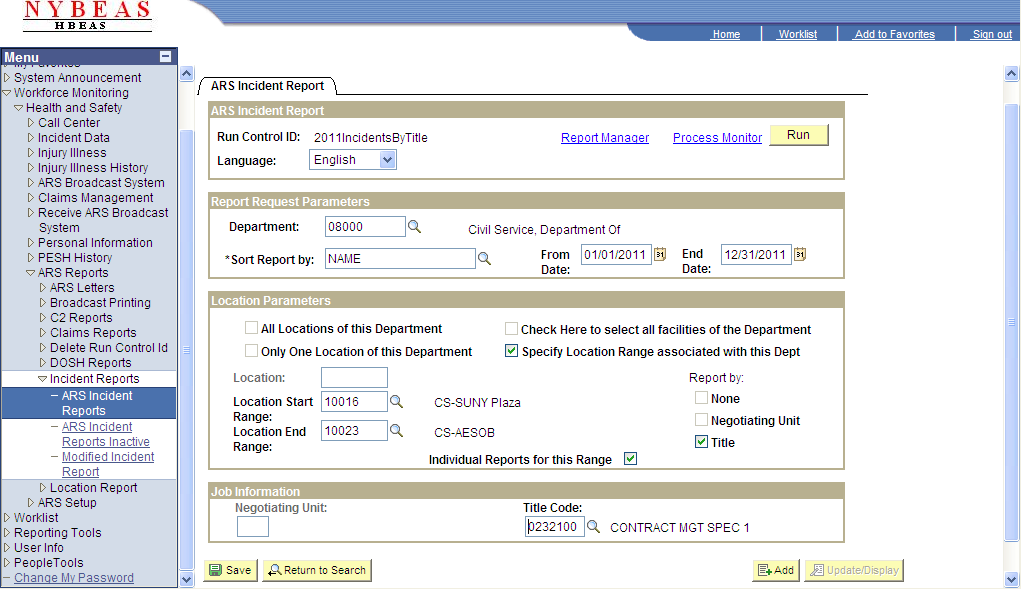
The description of the Title Code will automatically populate within the Job Information box.
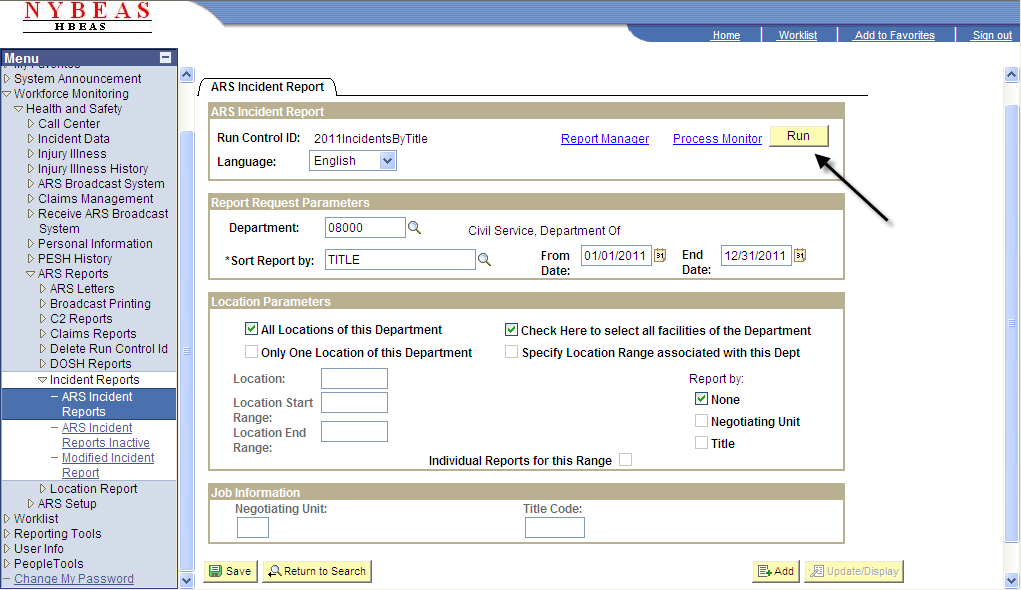
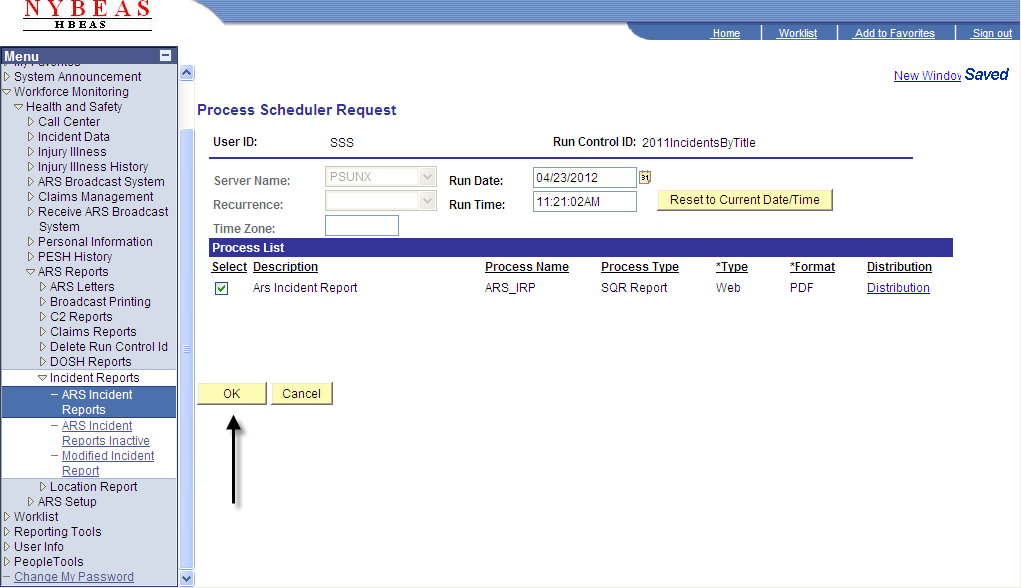
Once the report's parameters have been entered, it can be processed. Click the Run button to initiate the creation of the report.
Click OK.
Click on Process Monitor.
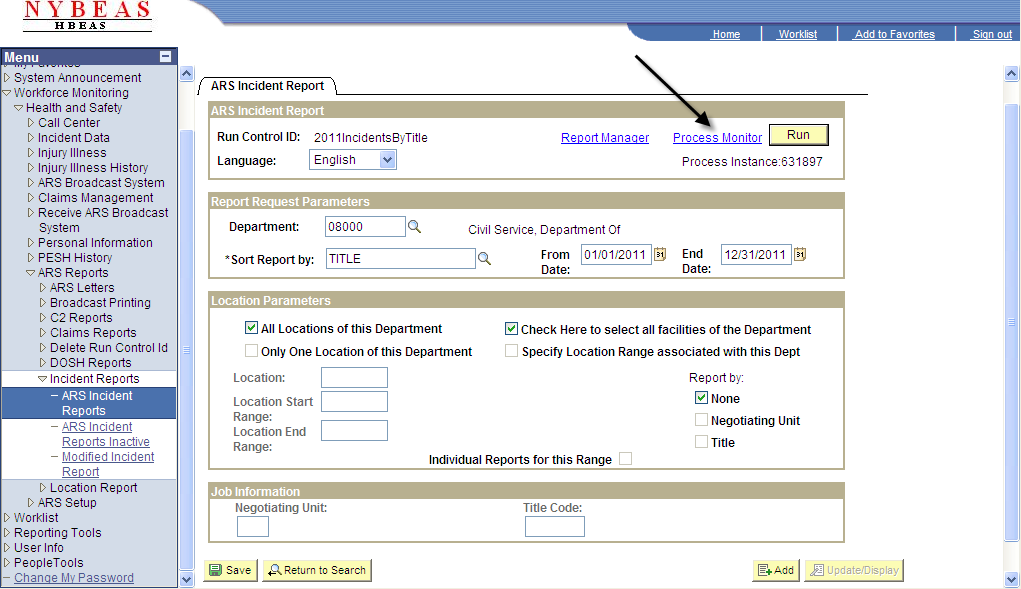
For this report, PSUNX or PSUNXE must be selected for Server and SQR Report must be selected for Type.

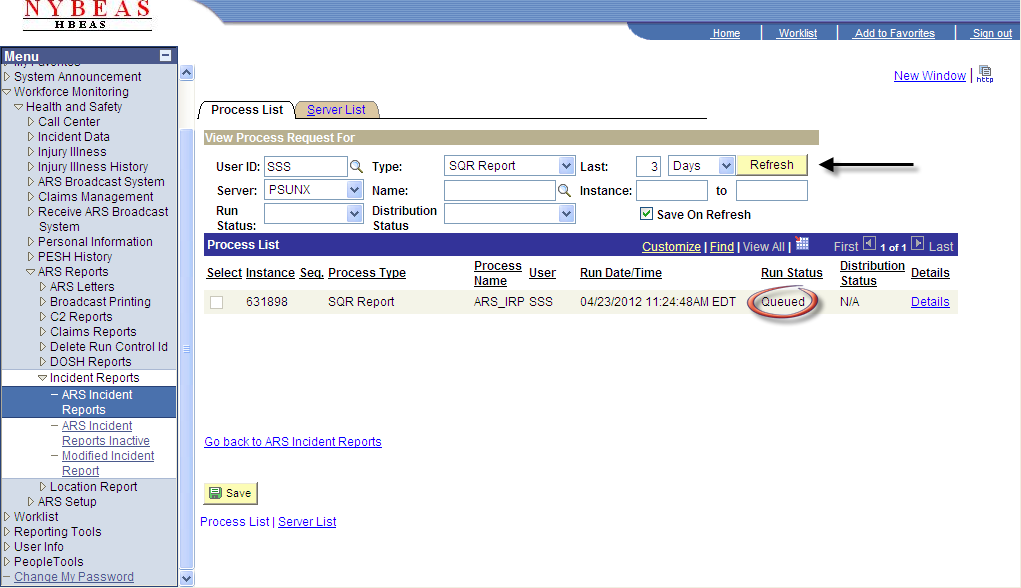
The most recent report created will be displayed at the top of all requests under the Process List. Under Run Status, you will see Queued, Initiated, Processing, then Success. (You may need to click the Refresh button until Success is shown.)
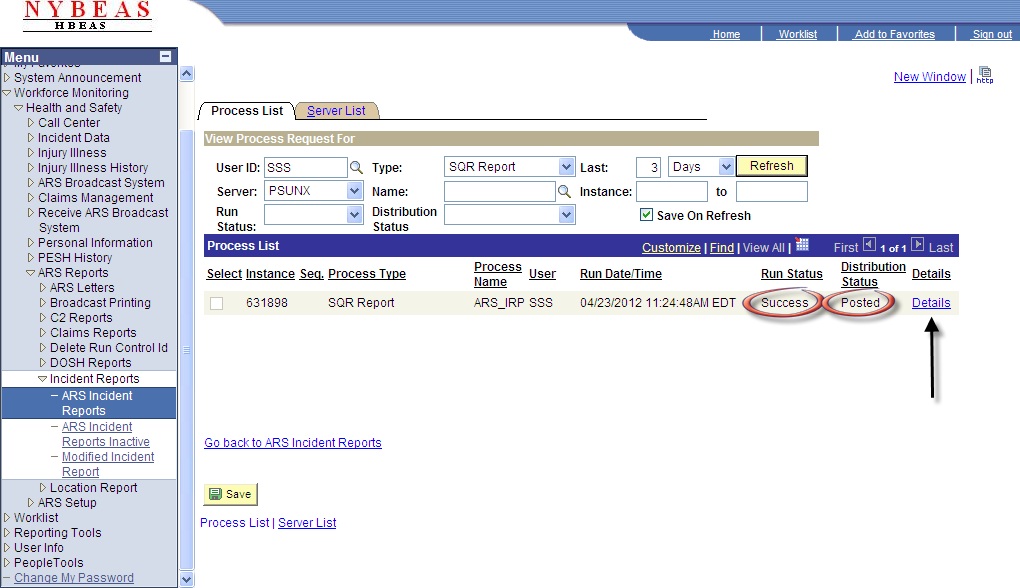
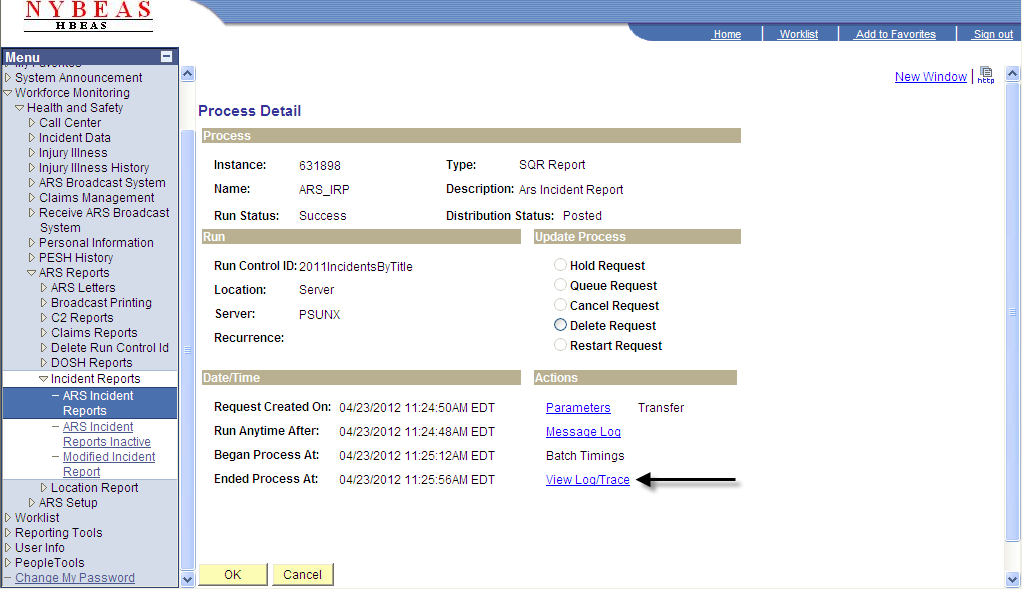
Once the Run Status displays Success and the Distribution Status displays Posted, click on Details.
On the Process Detail page, click on View Log/Trace.
Click on the .PDF report under File List.
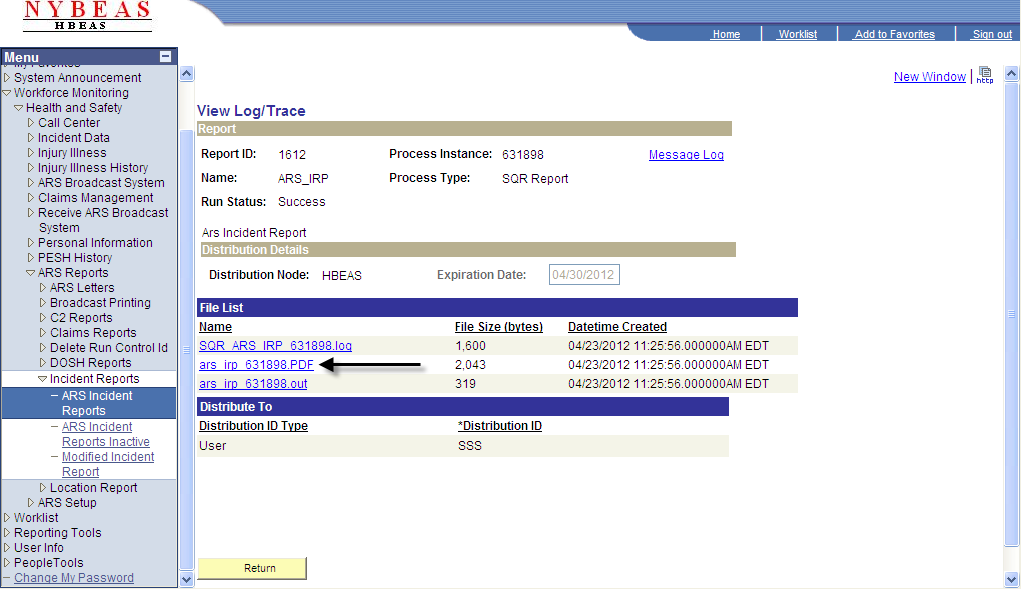
Your report will open in Acrobat/Adobe Reader for viewing. Click on the Printer icon at the top of the page to print the ARS Incident Report.

If a location of an agency was closed, incident reports for that location can be reviewed by following the same instructions as above within the ARS Incident Reports Inactive page.